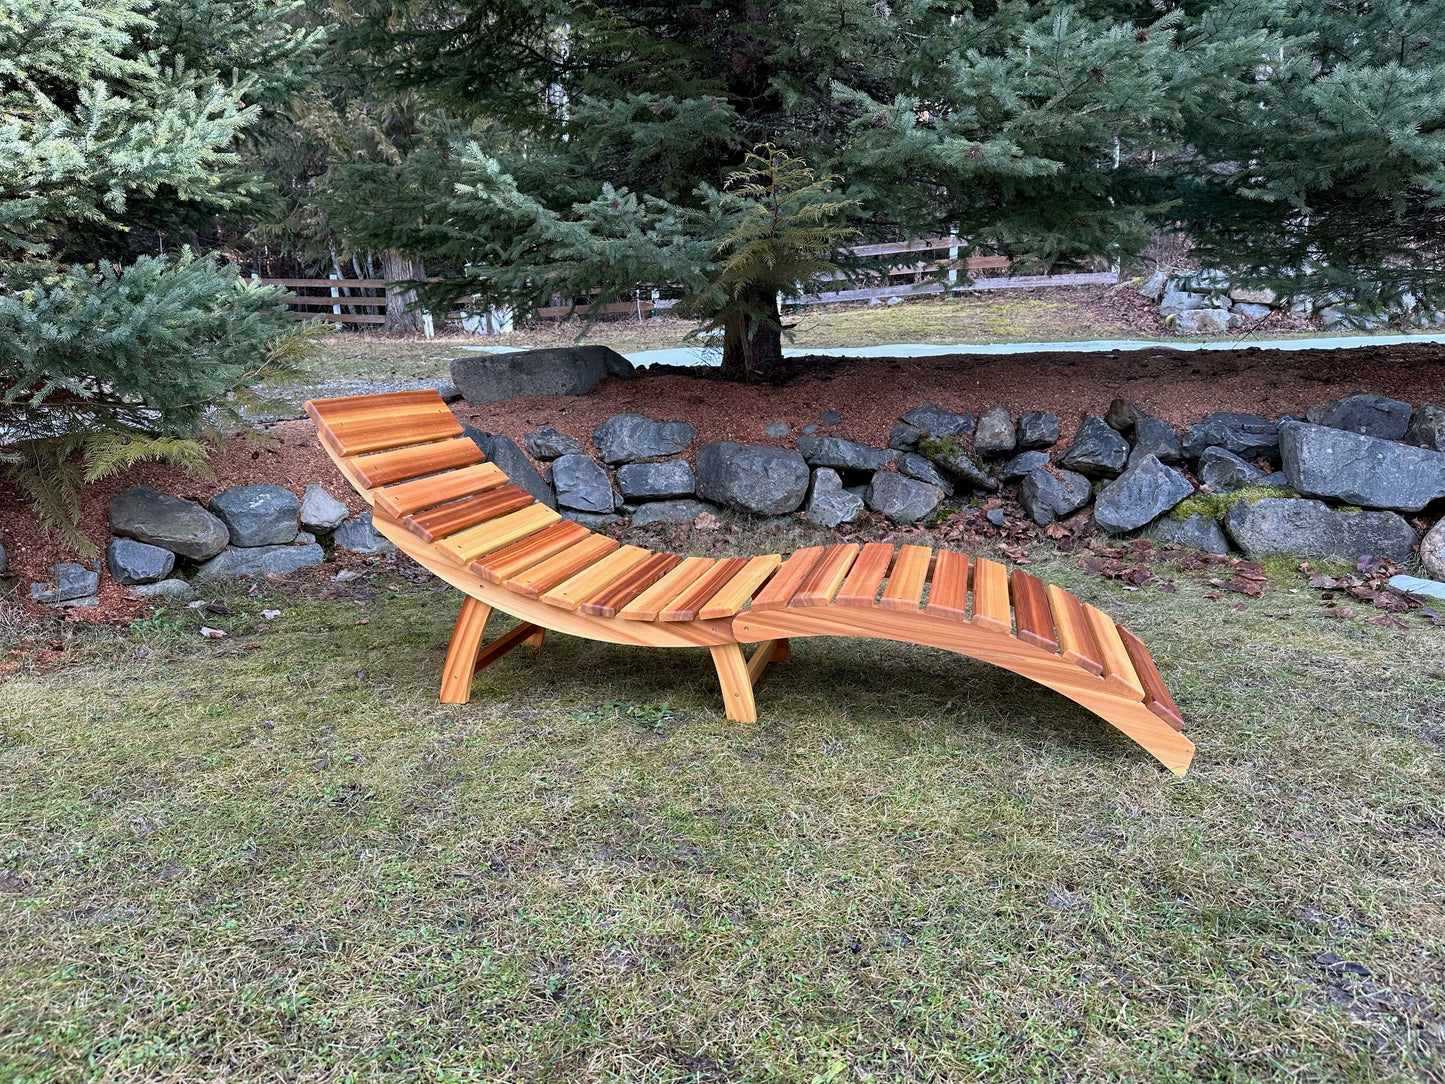
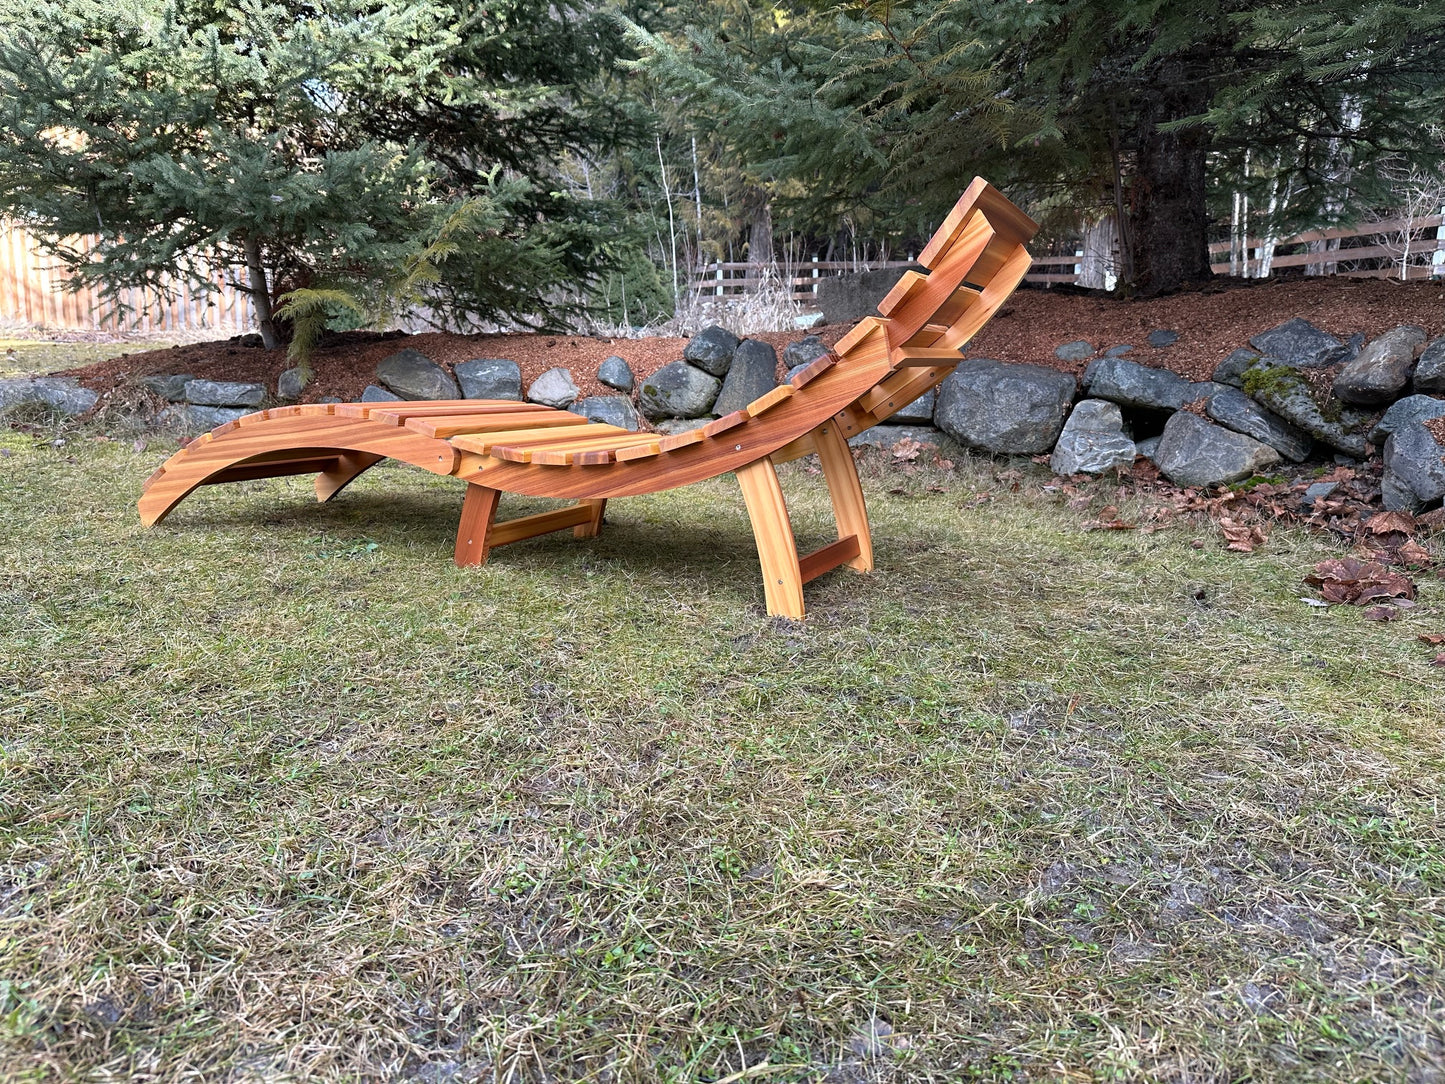
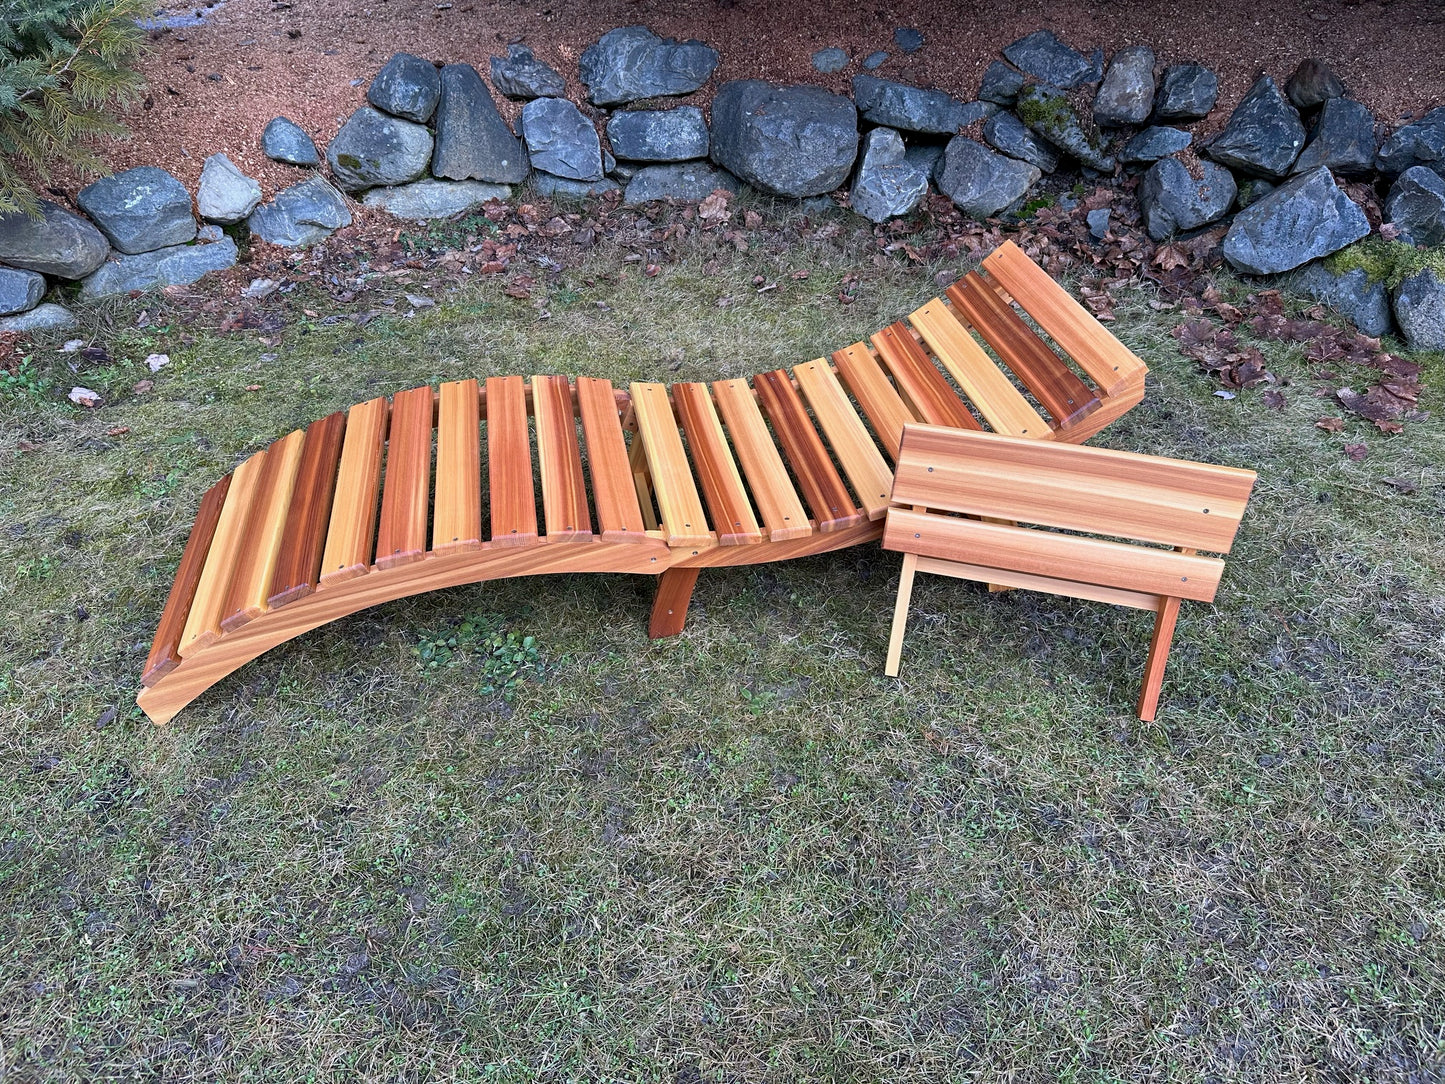
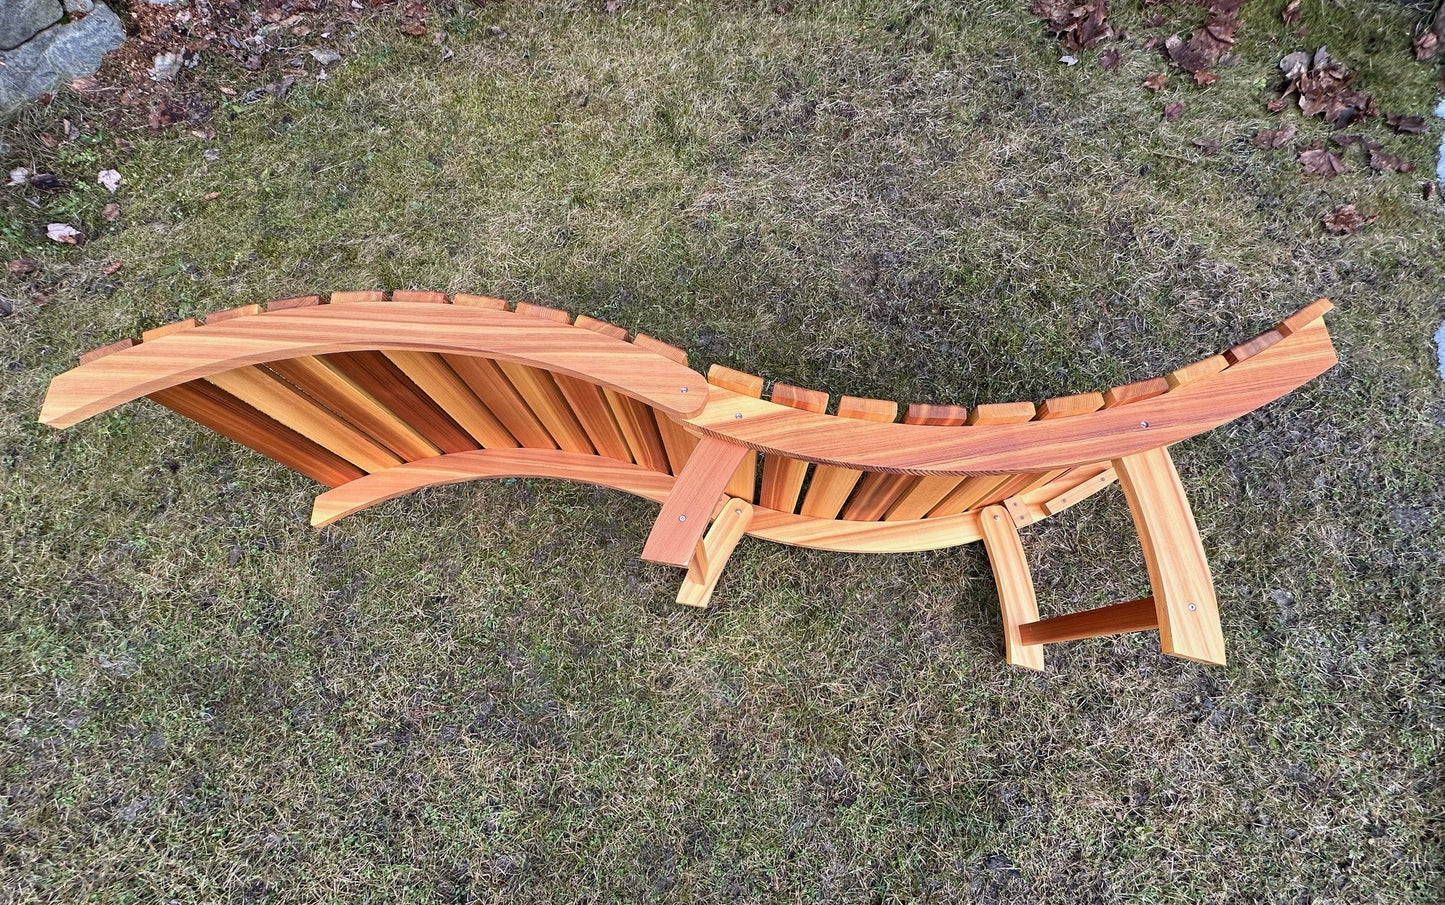
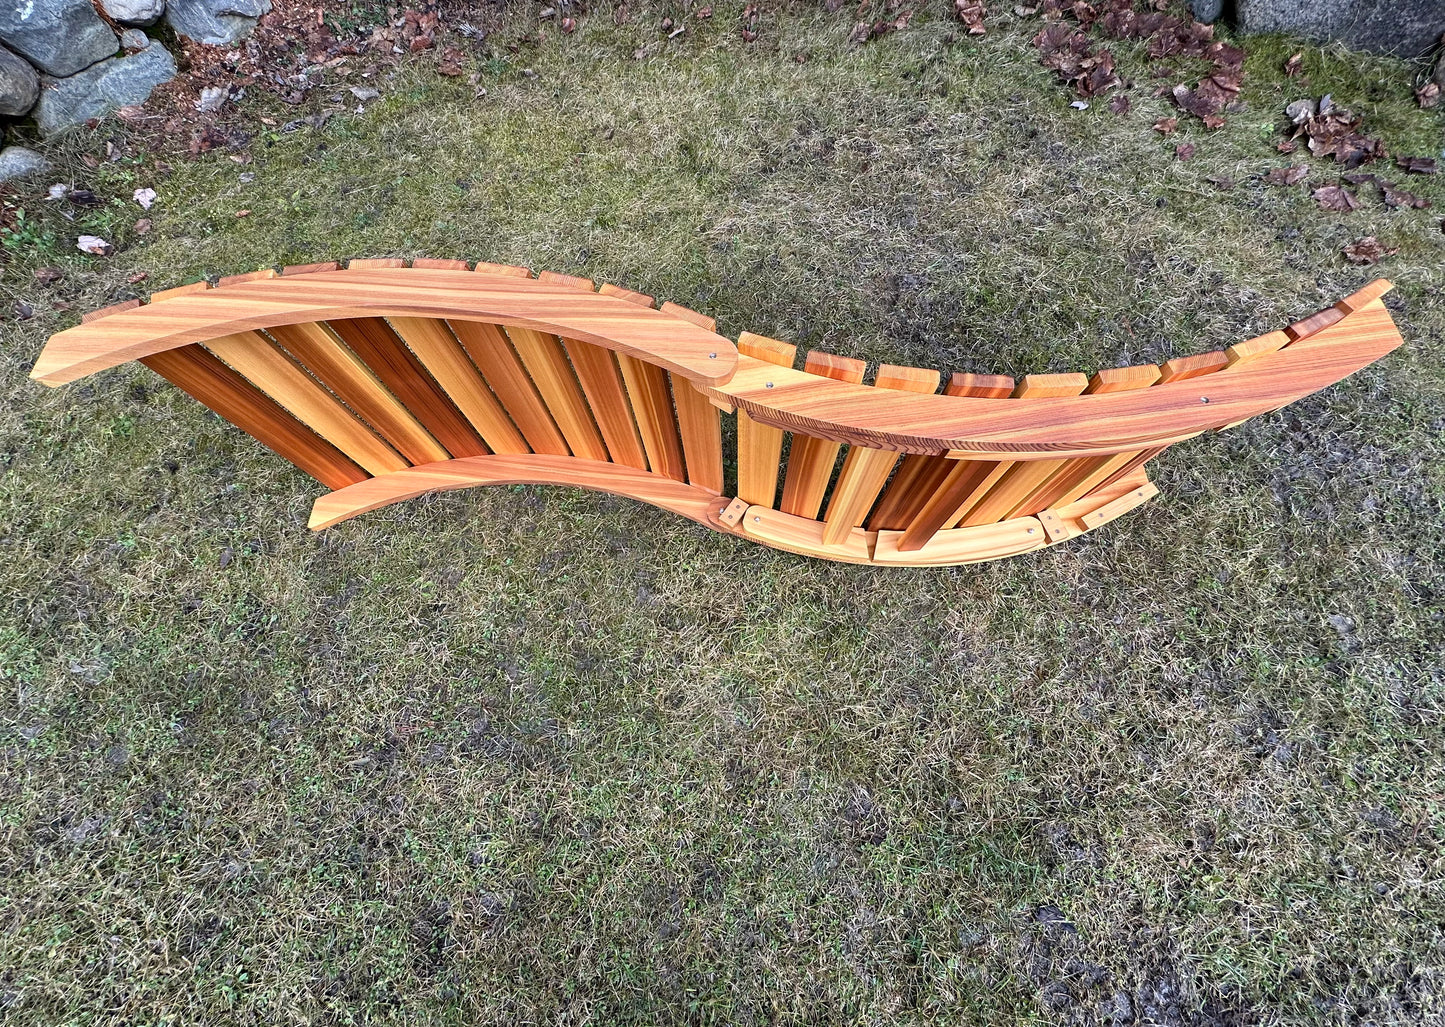
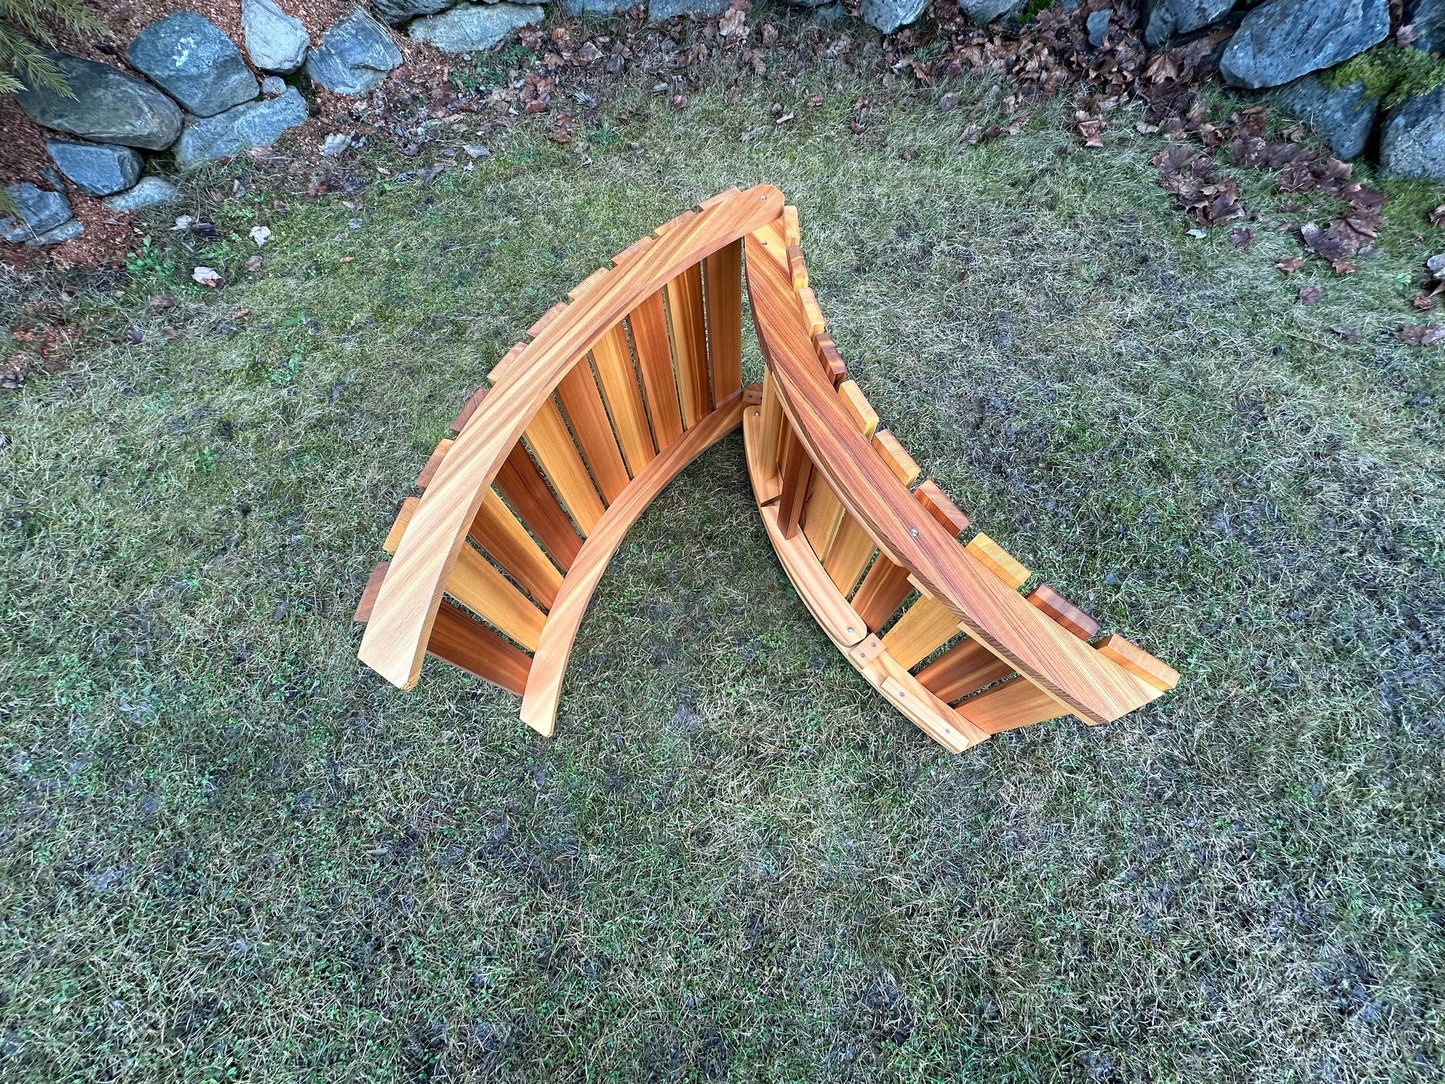
-This Cedar Lounger kit is very eye pleasing with flowing lines, comfortable to lounge on your deck or by the pool for hours, and a great feature being that it folds in half for easy slim storage for the winter or when not in use.
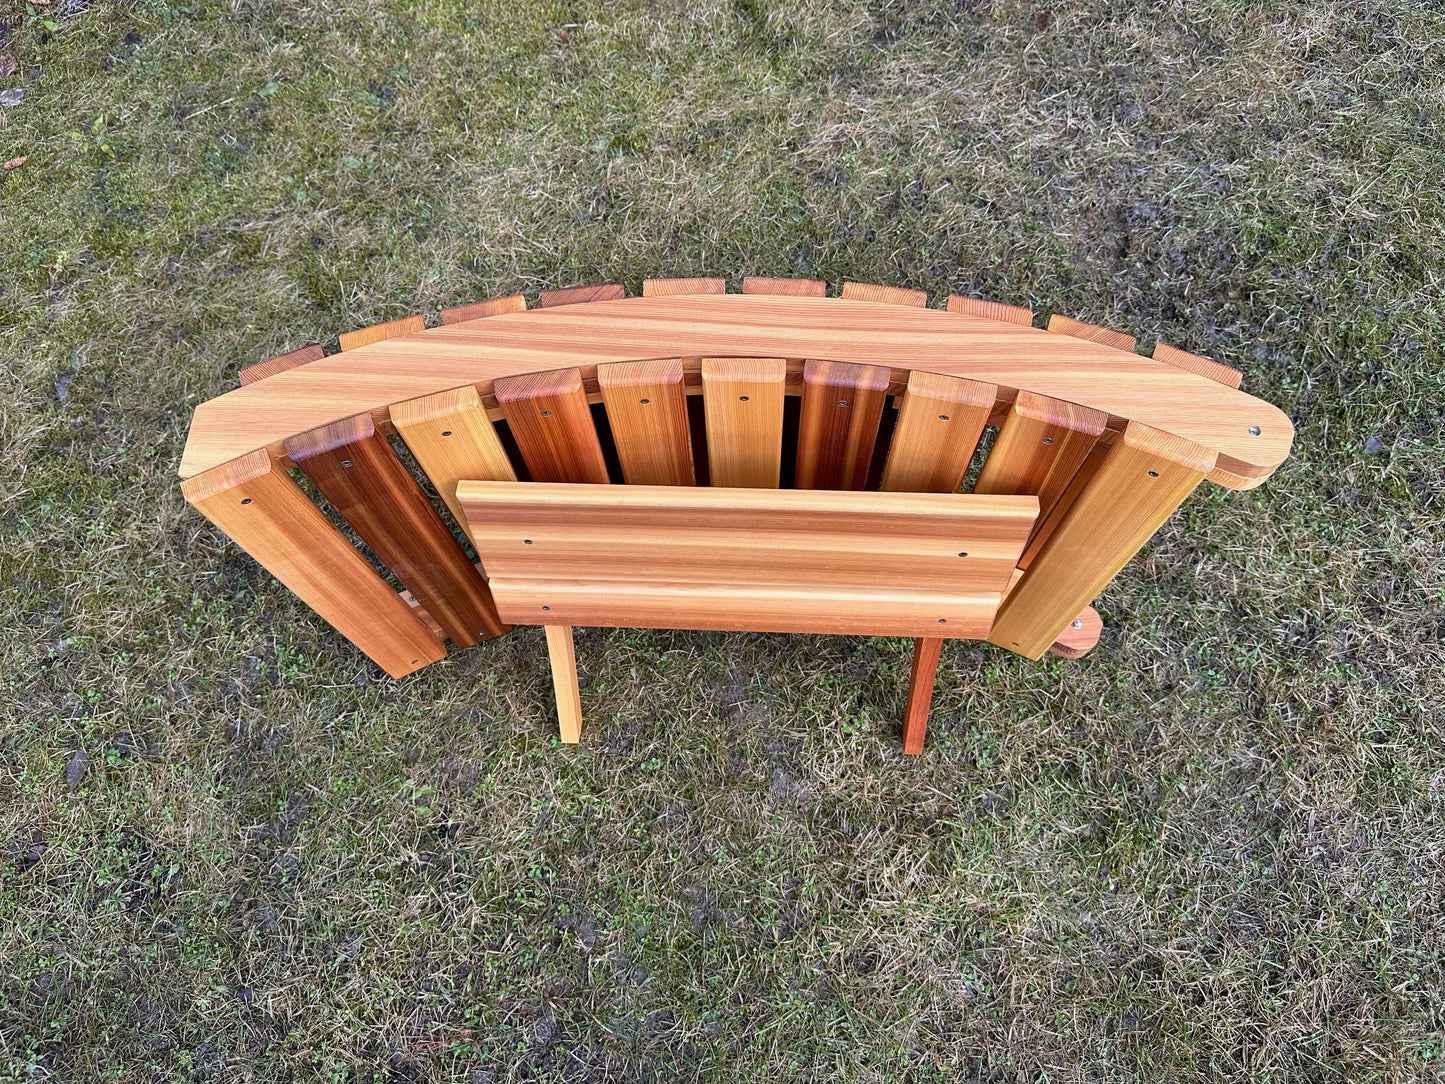
-The two-slat headrest is removable for a shorter person if needed and removes when the lounger is folded, to be stored separately.
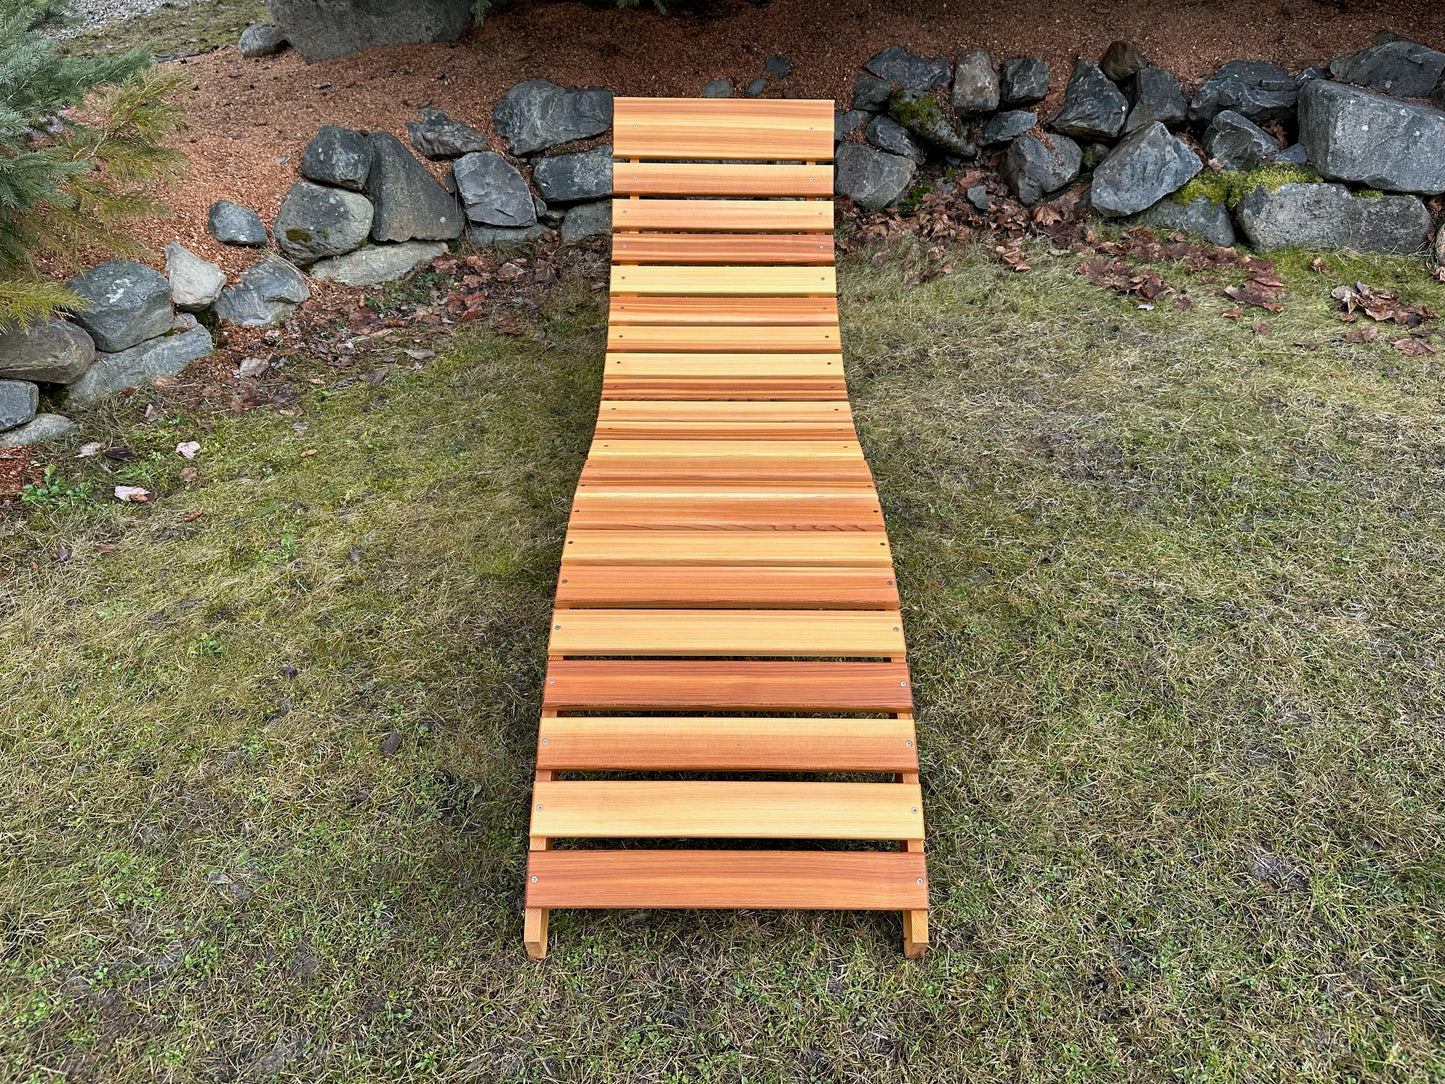
-Seating surface is 21" wide so most standard size chair cushions will fit.
-This premium tight-grain lumber is sourced from Old Growth Western Red Cedar, which is highly sought after worldwide and becoming increasingly rare. In lumber and furniture, you get what you pay for—lower-priced options simply can't match the quality, and there's a clear reason for the difference in cost.
-I use premium, quarter-sawn vertical grain, clear lumber to craft each chair, ensuring that every piece is not only unique but also of the highest quality, making it costly to produce.
-This kiln-dried lumber has been heat-treated in a specialized kiln to reduce its moisture content to a very low level, far lower than what’s typically found in big-box store lumber. This process ensures the wood is more stable and durable.
-"Clear" lumber means no knots, giving a blemish free look of perfection. Cedar is perfect for outdoor furniture because of it's light weight and resistance to decay.
-Starting with full 1-inch thick rough-cut wood, I end up with the thickest possible finished product after planing and sanding. Cheaper chairs often use thinner lumber to stretch their materials.
-The packaging is completely plastic-free. I use satchels of fragrant cedar chips as filler, and everything in the box is either reusable or made from 100% recyclable cardboard and paper.
-All shaping is done by hand in small batches using powered tools, following a "quality over quantity" approach. I often sell out during the busy spring and summer months, but I’m always making more, so restocks are typically quick.
Specifications
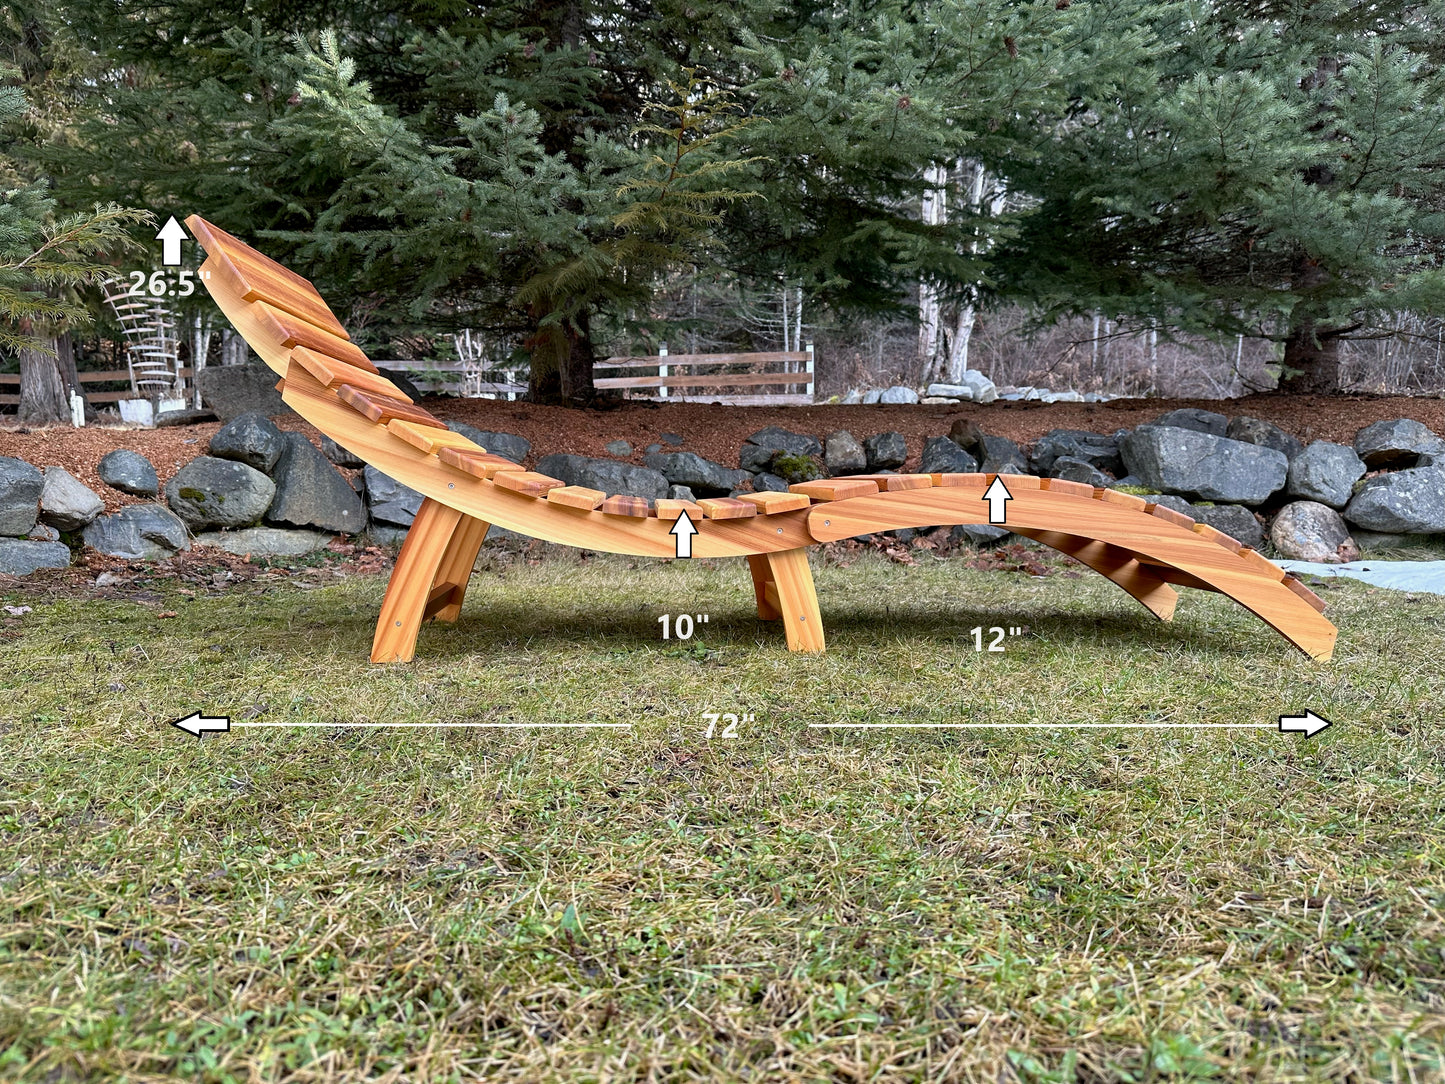
-Dimensions are approximately 72" long, 21" wide, and 26" tall at the headrest and weighs 24lb or 11kg. See photo 10 for full dimensions.
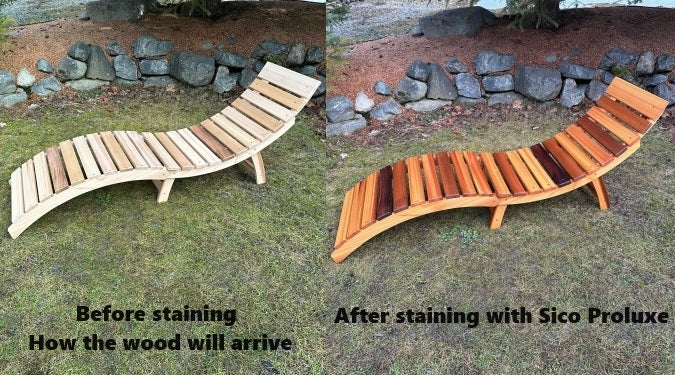
-The Lounger in the photos have been stained with Sico Proluxe Primary Coat RE 1. However all the wood I ship will be unstained, you will need to stain it if you wish, and I do recommend it for longevity
Assembly
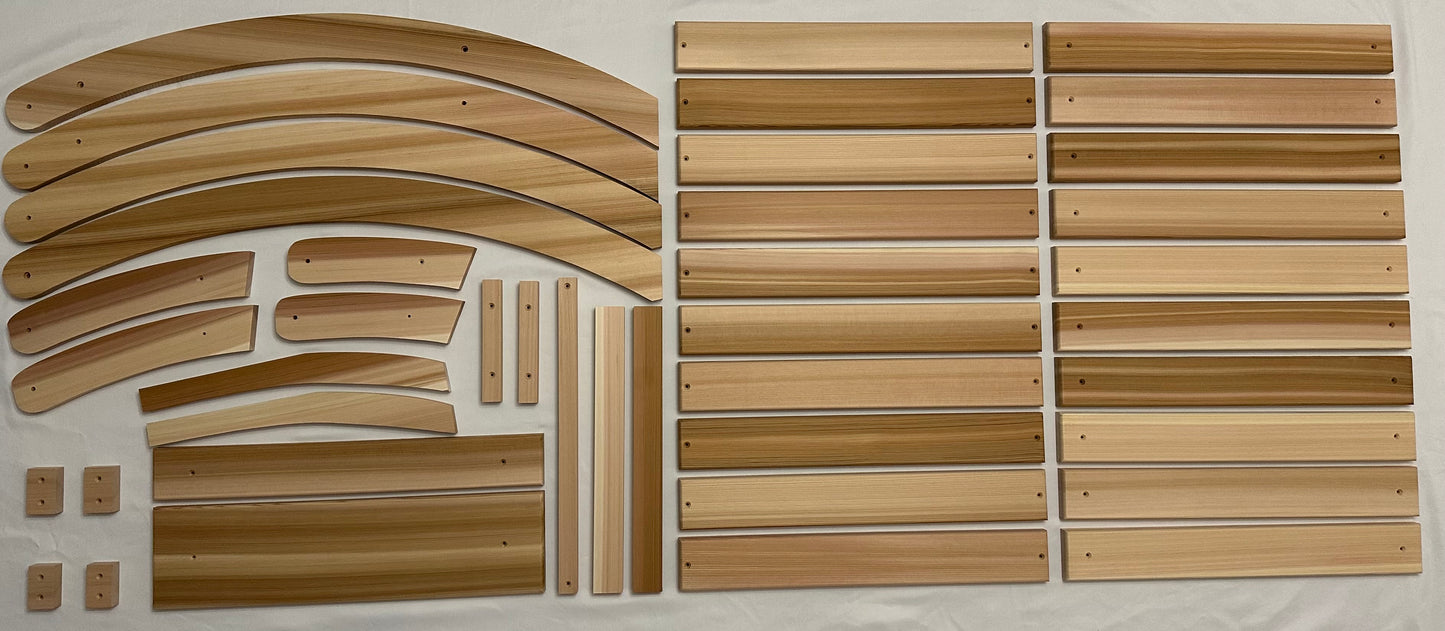
-Lounger arrives in 41 pieces, pre-drilled where applicable, countersunk where needed, seat slat edges rounded over and all finish sanded with 120 grit sandpaper
-Colour instruction sheet provided in the box
-Seat slat measuring tool, stainless steel screws, shoulder pivot bolts, allen key, and screw driver bit included
-Assembly takes between 1.5-2 hours depending on your skill level and comfort with assembling. You will require a drill and a measuring tape.
Our Milling Process
Here is a detailed overview of our lumber milling process, specifically focusing on the meticulous setting up and work required to mill vertical grain or 'quarter sawn' boards. Quarter sawing is a technique where the boards are cut from a log so that the growth rings of the tree are perpendicular to the face of the board, and makes a much stronger and more stable board that resists splitting after it’s dried. The best quality boards with the tightest growth rings comes from Old Growth trees. There are quality tiers in lumber and clear, quarter sawn is at the very top. That is what we use for our products and a reason why they are so expensive

We start off with a raw log, 8 feet long and this one is around 28 inches in diameter. Generally it isn't very efficient for us to start with anything less than this diameter, as the boards cut off each quarter won't be wide enough to utilize. A 28 inch log like this will be cut into quarters that are 14 inches at their widest, which should give us between 2-4 10 inch boards after trimming the live edge away and the core that is on the other side of the board. 26 to 36 inches in diameter is ideal for us
We then peel the bark off by hand, using a pry bar. This ensures we remove any gravel and anything else embedded in the bark that will wreck the saw blades. It also lets us see the wood underneath and any flaws or major cracks that we may need to work around when we start milling it. We then pressure wash the log as a second step to ensuring any sand or gravel is removed.
The log is then moved onto a thick bed of woodchips from our planer. This is so we can cut all the way through the log without hitting rocks or gravel with the tip of the chainsaw. We use a jig attached to the chainsaw bar that rides on a rail and 2x6 board. This will guarantee a straight cut along the length of the log, as long as we take the time to ensure the board is centered on both ends of the log, and is perfectly level and secure, using a skinny board as a shim on one side. Picture a flat board on a round log. The 42 inch bar on this saw is a bit excessive for this log but it is what we had on hand at the time.
Here is the log afterward, cut in half down the center
Then the jig is moved to each half, one at a time, and those are cut in half again. Using a smaller and more appropriately sized saw this time
We do this to several logs at a time to prep for the sawmill. Our kiln holds around 1000 board feet of lumber, and to get that amount we need to mill 6 logs into 24 quarters in order to fill it completely. Very rarely are the logs completely usable once we open them up; some may be full of knots or rot, so we usually need a few more than 24. This photo shows a little over half way there, but uses up all the space we have in front of the sawmill, so we start milling them from here

We use a bandsaw mill to cut the boards themselves. This type of mill uses a very thin blade and produces the least amount of waste when milling, compared to other types of sawmills. However, this translates to a lot of extra work to get those quarter sawn boards. Each quarter is placed on the bed and leveled using a scissor jack on one end of the 'log' to make each end the same height, and then a one inch cut is made. Since the quarter is sitting on its live edge, which is removed with each cut and turn, the edge that it's resting on from the previous cut is no longer there, so leveling it for a straight board cut is a tedious process that needs to be repeated after each cut
After that cut, the quarter is turned 90 degrees and again leveled end to end using a scissor jack. This alignment needs to be exact each time, otherwise the boards may be too thin or thick in sections and end up tapered and unusable for us. Then another cut is made at 1 inch
This process is repeated back and forth until the quarter has been whittled down to a very small piece, where we transfer to cutting off the bottom of it instead of the top. We can utilize a board as small as 2 inches wide so that is as far as we go down to
Once we have gone through all of the quartered logs and sawn them into boards, then we determine what width board we will get out of them. We look at each individual board and look for cracks or flaws, and choose the proper route to take, whether it is best utilized as a 2 inch board, a 6 inch board or a 10 inch board. We use many sizes in the shop, 2, 3, 4, 5, 6, 8, and 10 inches wide, and quarter sawing gives us a variety of it all, as every second cut is usually a narrower size board. Each grouping of sizes is then placed on the mill standing up on its edge and cut to finished width. Sometimes the board just needs a trim on one edge to remove the live edge, while other boards need both edges trimmed to get it to final size.

Here is a load of lumber after being milled and cut to size, each stack is organized into widths; 2 inch on the left up to 10 inch on the right. We use a cube van as storage for the boards. It keeps them out of the weather and we can use it to move the lumber from our sawmill over to the kiln easily
The last step is stacking the boards in the kiln. We use precisely cut spacers or 'stickers' placed between each layer of lumber to create an air gap so that the four circulation fans can blow air through the stack and across each face of the board. We use a Nyle dehumidification type lumber kiln to remove the moisture. It is notably efficient and produces a very good quality end product with minimal degradation, but it is not the quickest method of kiln drying. It raises the temperature in the kiln room to 40C or 104F and holds it there for the duration of the kiln schedule. Our drying process takes between 7-10 days to accomplish and bring the lumber down to an acceptable moisture content

Four sensors are placed within the stack or 'kiln charge' to constantly monitor moisture content in the lumber. There are four more sensors in the room that monitor conditions and make adjustments automatically; turn on the heater to add heat or open an outside vent to remove heat if it gets too hot. Also to monitor dry bulb and wet bulb temperature, then run the compressor to remove moisture from the air at a prescribed rate and keep the relative humidity in the sealed room at ideal conditions
Once all the lumber is down to the same moisture content that we are looking for then the kiln is turned off and the lumber sits for 2 days to cool down and equalize to the shop temperature before being run through the planer to cut each board down to equal thickness and we can then see the true face of the board and decide which parts we are going to make with it to showcase its character the best. This kiln charge will produce around 35-40 of our Adirondack Chairs.
Shipping
-Shipping calculated at checkout, simply input your address to get a quote
-I use the postal system; Canada Post, USPS, EMS to ship so please make sure they can deliver to the address you use when purchasing, or you may have to pay again to reship if they are returned to me as undeliverable
-International orders will have to pay local VAT when your parcel arrives, not included in shipping, it is your responsibility to check on local laws regarding them